
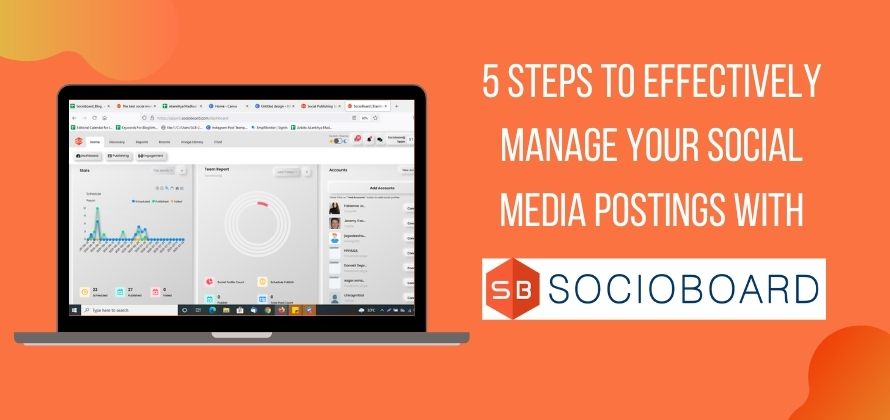
SocioBoard is one of the latest on board of open source social media management tool that has quickly risen up the ranks to the top of the list of SMM tools. If this is your first time blogging, you may not aware about social media management tools. “Social media- a group of technologies, including blogs, online collaboration and online network tools”. However, if you have been in the blogging scene for a while, you have probably heard about social media management tools.
Social media management can be overwhelming work if you don’t have any social media management dashboards. Because after creating those killer posts, you have to take off the writer’s hat, and put on the marketing hat. You have to market the content you create for the various social media platforms. SocioBoard is the one that can make this task easier for you. Rather than navigate your marketing content to individual social platforms, you can use SocioBoard to distribute your content to the various social media platforms at the click of a button. Using the SocioBoard social media management software can be a bit baffling if you don’t know where to start hence the purpose of this post. These are the step by step process that can guide you to manage your social media posting using SocioBoard.
Step 1: Sign Up For Free
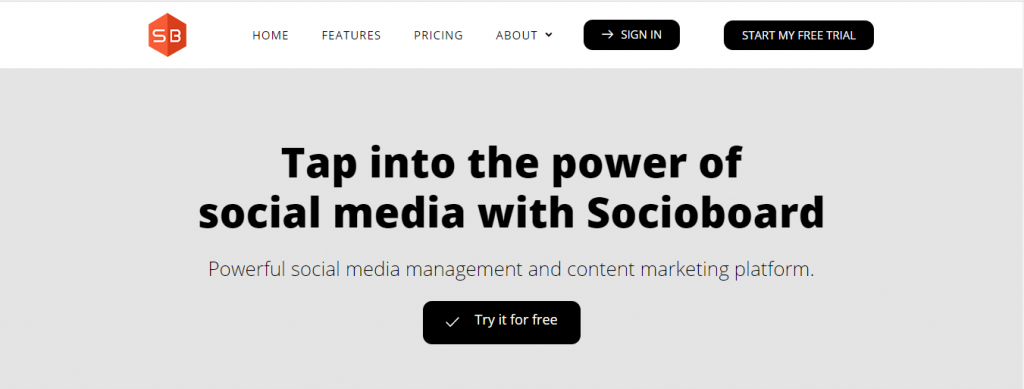
To begin your amazing social media management journey with SocioBoard you need to sign up which is absolutely free. Go to the SocioBoard webiste, there on the top you have the option to start your free trial. Tap on it and register to create a new user account. One can also sign in to the SocioBoard platform using their Facebook, Twitter, or Google account. For that one will need an active Google email address, username and password create a new account in SocioBoard. There you have the option to manage multiple social media channels by utilizing the single social media platform of SocioBoard that one can pick as the basic account for free.
Step 2: Add Your All Social Channels
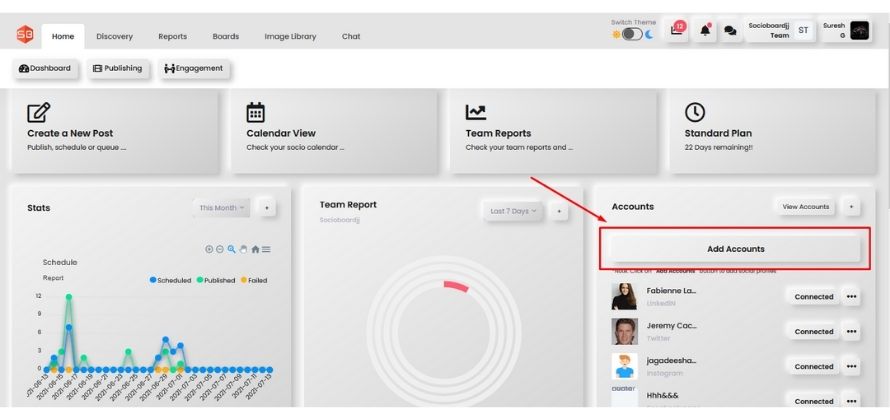 When the user step-up from the initial step to create an account, the platform will lead the user to the dashboard page. SocioBoard offers several features with content planning and social media management, depending on the plan selected by user. There user can also link up their Twitter, Facebook, Instagram, LinkedIn, and YouTube accounts on SocioBoard. When they click on the social platform, such as Facebook or Twitter, they will have to verify and allow the platform to your social media accounts. When user done with the process of account addition, click next and navigate to your SoicoBoard dashboard to start using tool’s features to manage multiple social media accounts.
Also Read:
7 SECRETS OF EMINENT SOCIAL MEDIA MARKETERS NO ONE WILL TELL YOU!!!
SOCIOBOARD: MANAGING SOCIAL MEDIA BEYOND POSTING.
SOCIOBOARD: EASY SOCIAL MEDIA MANAGEMENT FOR YOUR ORGANIZATION.

Step 3: Follow These Steps as a First Time User
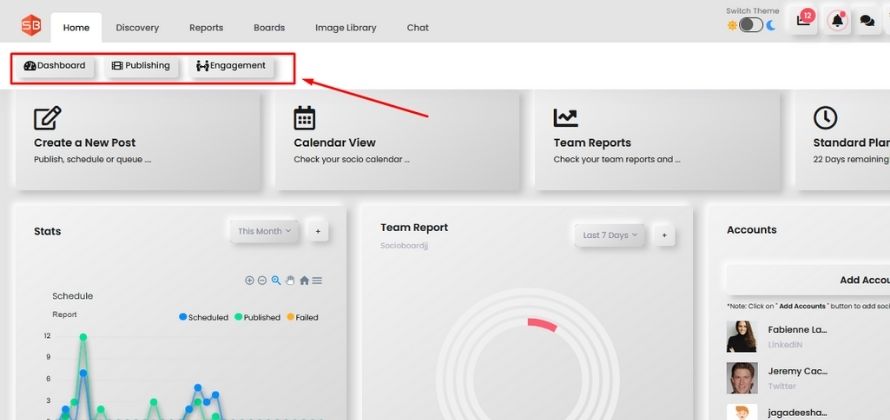
As a first time user, when you login to SocioBoard dashboard page. There you have 3 options under the home- Dashboard, Publishing, and Engagement. After adding your social media accounts, you can start publishing your posts and creatives on Facebook, Twitter, YouTube, (Instagram, Linkedin, Tumblr, Pinterest). Besides that you also have the option Engagement to analyze the performance of your social posts.
Step 4: Schedule posts with SocioBoard
SocioBoard is more than just a social media post-scheduling tool. Nonetheless, the tool does come in handy and customizable any time according to the needs. For schedule post, look over the SocioBoard dashboard. At the top of the dashboard page, you can see a ‘Create a new post’ tab over there.
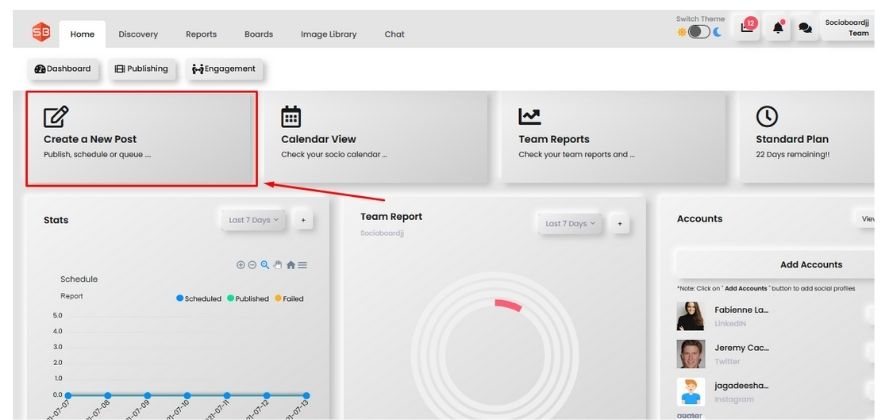
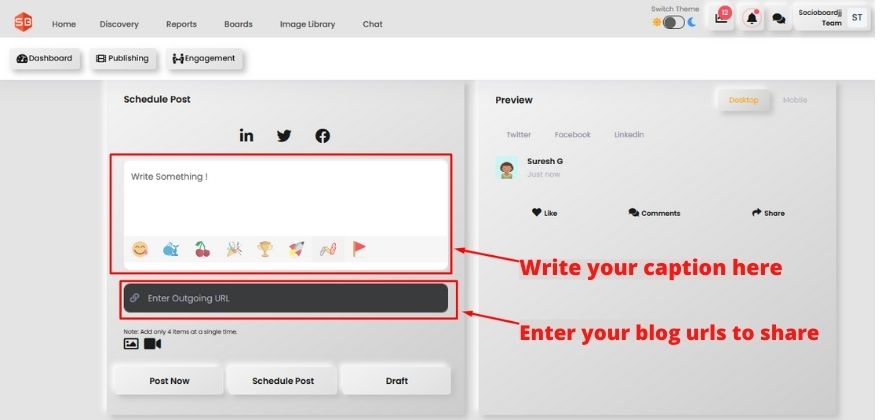
When you tap on it, in the next page you have the option to compose message tab, or add photos or video creatives. And then fixed the time when you want to schedule that post to your social platform. After submission of post, you can also get the preview it. If you go back to th dashboard, there you can see the calendar view option where you can view the scheduled post on your accounts. After scheduling your post, you can also opt for auto post or manual posting option.
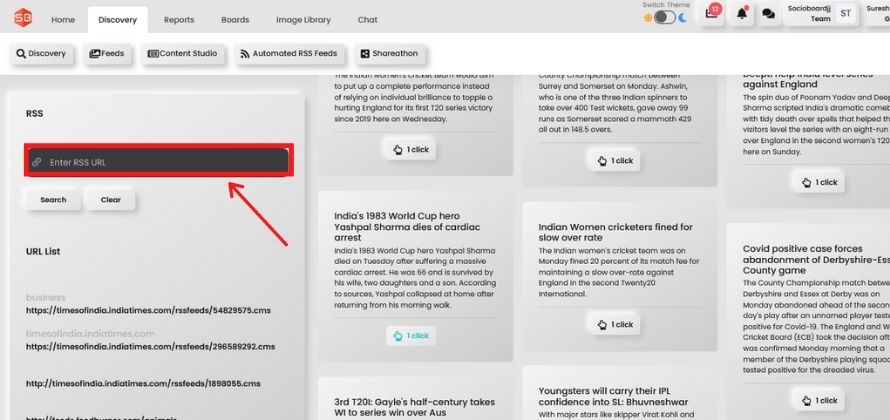
Step 5: Adding your blog RSS
If you are utilizing SocioBoard to deal with a customer’s social accounts, blogs and web journal, you have to add the website RSS to the SocioBoard platform. Doing this it will empower you to auto-post blogs the minute you publish them.
SocioBoard offers you things beyond than what you have seen here. For example, one can schedule postings to Facebook, Twitter and Instagram fans community groups. To do this, one just needs to select “add social network” and select your social media channel. From there, one can choose the groups that SocioBoard imports to their social media management dashboard. Now that you have read all the steps necessary to manage your
Social media campaigns effectively, start using Socioboard to manage your online campaigns now.


Recent comments